As I have stated in earlier posts, I have lost all of my Unity work and thus I have only presented the one video I have left from my blog. Due to the fact that I do not even have the original file from the student shared file, I have not been able to refine any of my compositions or even start from scratch due to the fact that I have no where to even start from - there is nothing on the server.. And as much I want to, due to time constraints, I simply have no time to watch tutorials and try and learn this programme from the roots up.. If I had more time or less work in my other papers I would have but I just hope that my iteration work and experiments from earlier programmes would back my claims up that I would have actually done all of the work if I did not have everything possibly that could go wrong, go wrong for me with Unity..
Once again I apologise, but I will not be submitting a final for the programme Unity 3D.
A link to my files are at this address:
https://www.dropbox.com/sh/zfjzhspcuphz1v5/AAAl1Xnb39Jv63svknZbM9_ca?dl=0
Sunday 24 August 2014
Sunday 17 August 2014
Rendering Finals - Quartz Composer - 'Opaque Wavelength'
For my Quartz final, I wanted to try and take my audio visualiser experiment a bit further in which I could use the stop watch patch to generate the lines at different times to make a shape. I have also added an audio input which codes for the start and end length of each line so the more noise the mic picks up, the longer the lines. Lastly, what I have done to this final is add an opaque parameter to the lines. When the user moves the mouse along the x-axis, the opacity of each line becomes more or less opaque respectively.
Unfortunately due to time constraints and understanding of this programme, I have not been able to take this final as far as I would have liked to, but I am really interested in using this programme so I may look at it for next assignment..
A link to my files are at this address:
https://www.dropbox.com/sh/zfjzhspcuphz1v5/AAAl1Xnb39Jv63svknZbM9_ca?dl=0
A video of my final composition is as follows:
https://www.dropbox.com/sh/zfjzhspcuphz1v5/AAAl1Xnb39Jv63svknZbM9_ca?dl=0
A video of my final composition is as follows:
I have included this second video - not sure why it isn't HD too? Anyway instead of leaving my first video going for like two minutes as time progressed and more and more lines were added, I decided to stop and then come back to it..
My design process to get to the above videos is below:
 | ||
So I have taken inspiration from my audio visualiser experiment - this is the code from that experiment. Very basic code I know, but the composition conveys the idea I was trying to achieve.
|

.png)
.png)
.png)
.png)
 |
| The next step was to duplicate the line family patch and then change the parameters accordingly so that I could continue to create an aesthetically pleasing form. |
.png)
.png)
.png)
.png)
Line Family Form Finished:
 |
So I have skipped a few steps in order to try and streamline this annotation process, but I have duplicated the line family and audio input patches another three times in order to create the form below. They all have slight differences in their respective parameters but nothing too major. Again their start and end line lengths are all influenced by the audio input of the mic. To create consistency I have kept each of the line families having a line count of 373. I wanted to clear that up because due to a couple of the line families twisting onto itself, there are sections where there looks like there are a lot more lines than that and it is uneven...png) .png) .png) .png) .png) .png) |
.png)
Adding the Stopwatch Patch:
 |
| The next step I have done is add two stop watch patches to each line family. I have done this so that they control the line count. Every second more lines are added to slowly reveal the form as time goes on.. Due to the audio input as well, the lines are changing length to help disguise the form for as long as possible. The following images are a time series from the start with only a very low line count through to 1000's of lines - just to reiterate their length are all being influenced by the audio level. |
.png)
.png)
.png)
.png)
.png)
.png)
.png)
.png)
.png)
.png)
.png)
.png)
.png)
.png)
Finally, Adding Opacity to Line Families:
 |
| What I have done now is add two patches - first the mouse patch which is connected to the input function of the colour transformation patch. As one moves the cursor along the x-axis the line families either become more or less opaque. This is also helping to convey the idea of slowly revealing the form. It is a bit hard to take screenshots due to the fact that they will either be black or with my line families hard to see through to what is already above. Check out the above video to see it in action. |
Refining Finals: Processing - 'Draw Your Own Composition'
I have taken inspiration from a couple of my experiments in the fact that I wanted to create a composition that was forever changing and when the user moves the mouse the pattern overlays and covers the pattern that is underneath. I wanted to use my circle experiment as my basis in which the circles form are dependent on the mouseX and mouseY values and they continue to overlay one another to create interesting forms. However I wanted to add a element of the composition in which it will be doing something even whilst it is not being interacted with by a person.
A link to my files are at this address:
https://www.dropbox.com/sh/zfjzhspcuphz1v5/AAAl1Xnb39Jv63svknZbM9_ca?dl=0
A video of my final Processing composition is as follows:


At this present stage, I feel that the background is slightly too dark so some of my model is getting lost as it bleeds into the background. I will lighten this up slightly however keeping within the monochromatic colour scheme..


noStroke Implemented Again:


A link to my files are at this address:
https://www.dropbox.com/sh/zfjzhspcuphz1v5/AAAl1Xnb39Jv63svknZbM9_ca?dl=0
A video of my final Processing composition is as follows:
 |
| I have started off my code by finding an example that uses a rotated popMatrix and have used this as a starting point for my own composition. Presently the boxes spin around continuously however do not do anything else other than that. The lighting code that is implemented in this example creates the tonal differences and gives the model another three dimensional element. |
 |
| A couple of screenshots of the example composition in action. |
 |
| My next step was to set up the canvas size and the colour mode. I have decided to extend the canvas to 800x800 pixels in order to allow for more room around my composition - thus bring even more emphasis on it. I also wanted to make my composition look a lot more eerie and mysterious therefore I have added the colorMode line of code. Last thing that I have done in this screenshot is to remove the noStroke line of code so that my composition has a cartoony look and feel to it now. It also makes each of the boxes stand out a lot more bringing the focus back to the pushMatrix. Below are a couple of screenshots showing where I am at this stage.. |
 |
| I have now changed a couple of things to the composition. Firstly I have increased the number of boxes within the pushMatrix from 12 to 25 in order to try and create a really funky looking composition. With the stroke back on, this is starting to look really interesting if I do say so myself. Secondly, I have added the code that Tim open sourced us earlier on in this project which allows one to save a jpeg straight from Processing. A few images of what my model looks like at this point are as follows: |
At this present stage, I feel that the background is slightly too dark so some of my model is getting lost as it bleeds into the background. I will lighten this up slightly however keeping within the monochromatic colour scheme..
 |
| In order to ratify the above statement, I have decided to remove the background colour line of code. This has resulted in the canvas returning to its default colour. This is not ideal either, however it is better than before due to the fact that I can actually see what's happening in my model now.. |
Adding Scaling to Composition:
 |
| I have looked back at the example that I have actually posted on my blog in which as one moves the cursor along the x-axis, the shape gets larger or smaller respectively.. I have grabbed the two lines of code that could be used within my own composition and pasted them in. The float zoom and scale zoom lines enable the user to scale the pushMatrix large enough to fill the screen and then repaint the pattern on the canvas as it is forever changing - thus the title of this work.. Due to the lighting in my composition, the tonal differences that then become part of the background are quite beautiful. I have included at the bottom of the following images what the composition looks like with the noStroke code put back in, however it does not retain the same level of cartoony, mystery that it has with the stroke on.. |
noStroke Implemented Again:
 |
| As you can see, there just isn't the same mood or aesthetic that is created in the previous composition. It looks very soft and delicate, however I want to create the opposite - sharp and dangerous. I think I will put stroke back on and progress from there. |
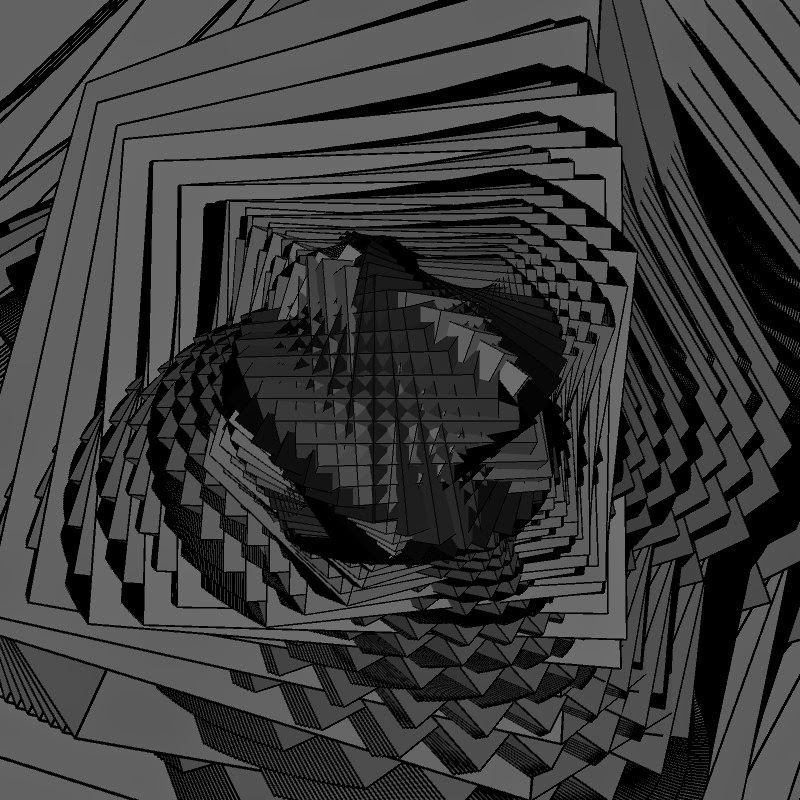
Speeding up the Rotation Speed:
 |
| My final: As the heading suggests, I have changed the integer 'a' value from 0.01 to 1. What the integer 'a' codes for is the angle of rotation between each box. By increasing the angles respectively, the result is the boxes looking like they are spinning a lot faster. The pattern that is created accordingly also changes into something that I feel is quite beautiful. I will use this composition as my final. |
Subscribe to:
Posts (Atom)